
Stamps let you add text, images, barcodes, and QR codes on top of your emails and attachments. They are applied when you print or convert to PDF.
Common uses:
- Mark archived documents with Received on and the date.
- Add Confidential or Urgent on printed pages.
- Print a QR code on an order, for example a link to a Google Maps address.
- Add page numbers.
Create a stamp
- In the left menu, click Tools, then Stamp templates.
- Click New stamp, or select an existing stamp to edit it.
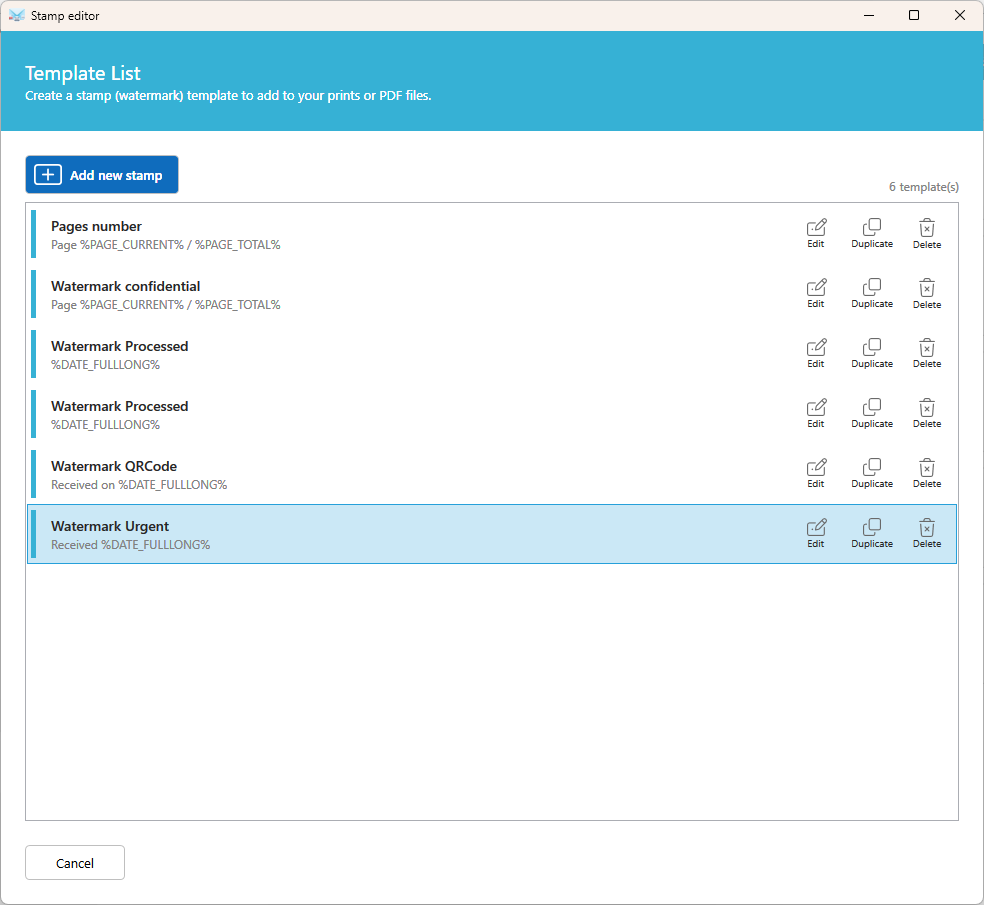
- Give your stamp a name, then set up its content as described below.
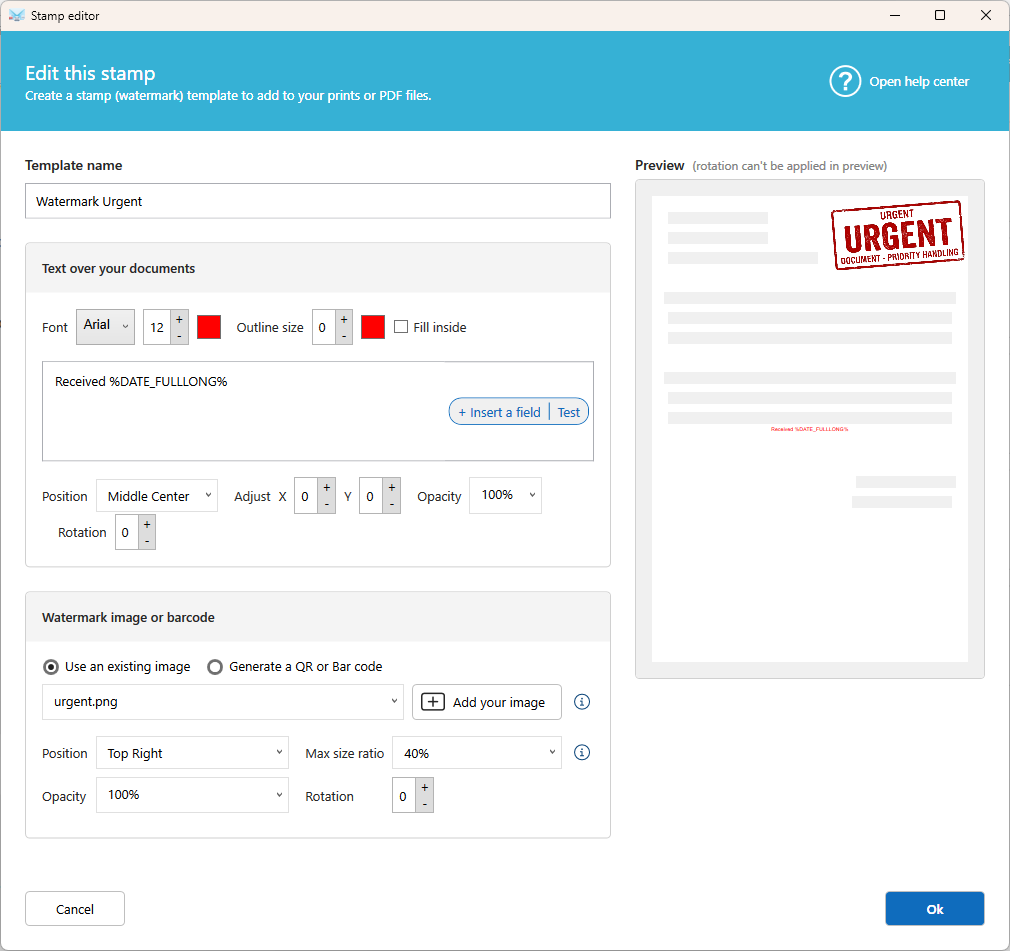
Text
Add text over the document.
- Text: Enter the text to print. Click Fields to insert email data, such as the date, the sender, or the subject.
- Font name and Font size: Choose the look of the text.
- Color: Choose the text color.
- Border size and Fill border: Add a frame around the text.
- Position: Select where the stamp appears on the page. Use Adjust position to fine-tune it.
- Transparency: Make the stamp see-through so it doesn't hide the original content.
- Angle: Rotate the stamp, in degrees.
Image (watermark)
Add an image over the document.
- Image: Select an existing image, or generate a QR code. Ready-to-use images like Confidential and Urgent are provided. To add your own, copy them to this folder:
C:\ProgramData\Namtuk\AEM10\Templates\Stamps - Position: Select where the image appears on the page.
- Max size ratio: Limit the size of the image. For example, a large image never covers more than 40% of the page width.
- Transparency: Make the image see-through so it doesn't hide the original content.
- Angle: Rotate the image, in degrees.
Barcode and QR code
- Generate a code from your email data:
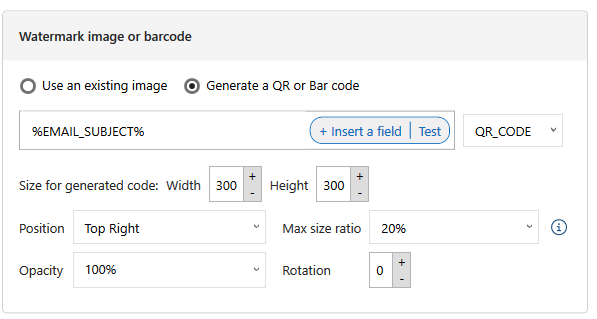
- Fields: Select the data to encode. For example, a value extracted from the email with a data extractor template.
- Format: Select the code type, such as QR or EAN13.
Use a stamp in an action
- Open the scenario and edit an action that supports stamps, such as Print email body, Save email to disk, Print attchments....
- Click More options...
- Turn on Add a stamp and select your template.
Tip: Set a low transparency on watermarks so the original text stays readable.
Related articles
- Action: Print email body
- Action: Print attachments
- Action: Save email to disk