
Automatically sort your incoming emails with colored categories, directly on the server. The category can be a fixed name, like Invoices, or built from the email itself, like the sender name.
Available for Office 365 and Exchange accounts only.
Add the action
- Create or edit a scenario.
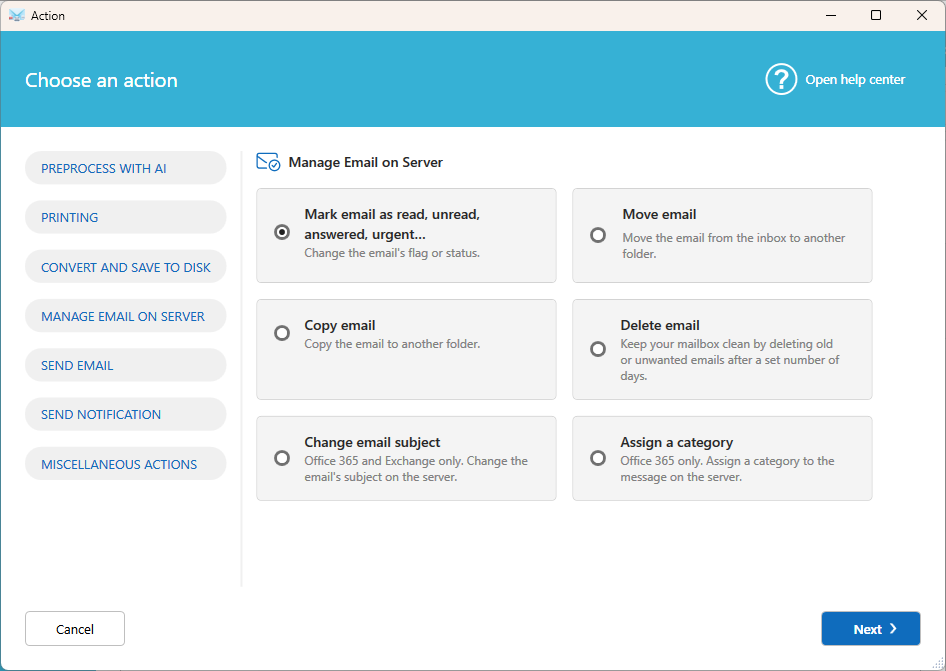
- Click Add action, then select Manage email on server, then Assign a category.
- Configure the action:
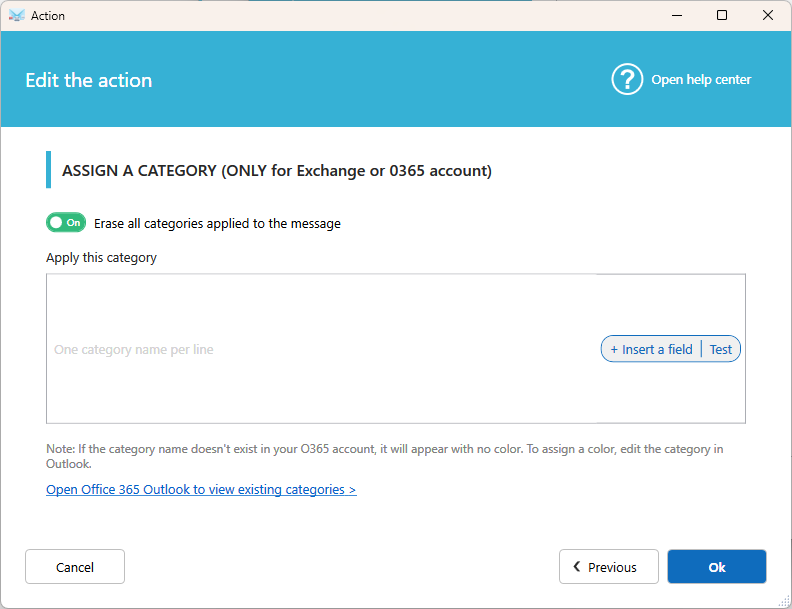
- Erase all categories applied to the message: Removes the categories already assigned to the email.
- Apply this category: Enter the category name. To apply several categories, enter one per line. Click Fields to use email data as a category name, for example the sender name or the subject.
Note: If the category doesn't exist in your Office 365 account yet, it is created without a color. To set a color, open Outlook and edit the category there.
Examples
- Sort by customer: use the sender name field as the category. Each customer gets their own category.
- Flag important emails: add a condition on the subject, then apply the category Urgent.
- Start fresh: turn on Erase all categories to replace existing categories with the new one.
Tips
- Combine this action with a condition to categorize only the emails you need.
- Add Mark email as read, unread, answered, urgent to the same scenario to complete the sorting.