
Send a reply each time a message arrives. The reply goes to the sender of the original email, so there is no recipient to enter.
By default, Automatic Email Manager follows the RFC 3834 standard and does not reply to automated messages. This prevents endless reply loops between two automatic systems. You can change this in Options.
Your account needs valid SMTP settings to send replies. Learn how to Set your SMTP to send emailet up SMTP.
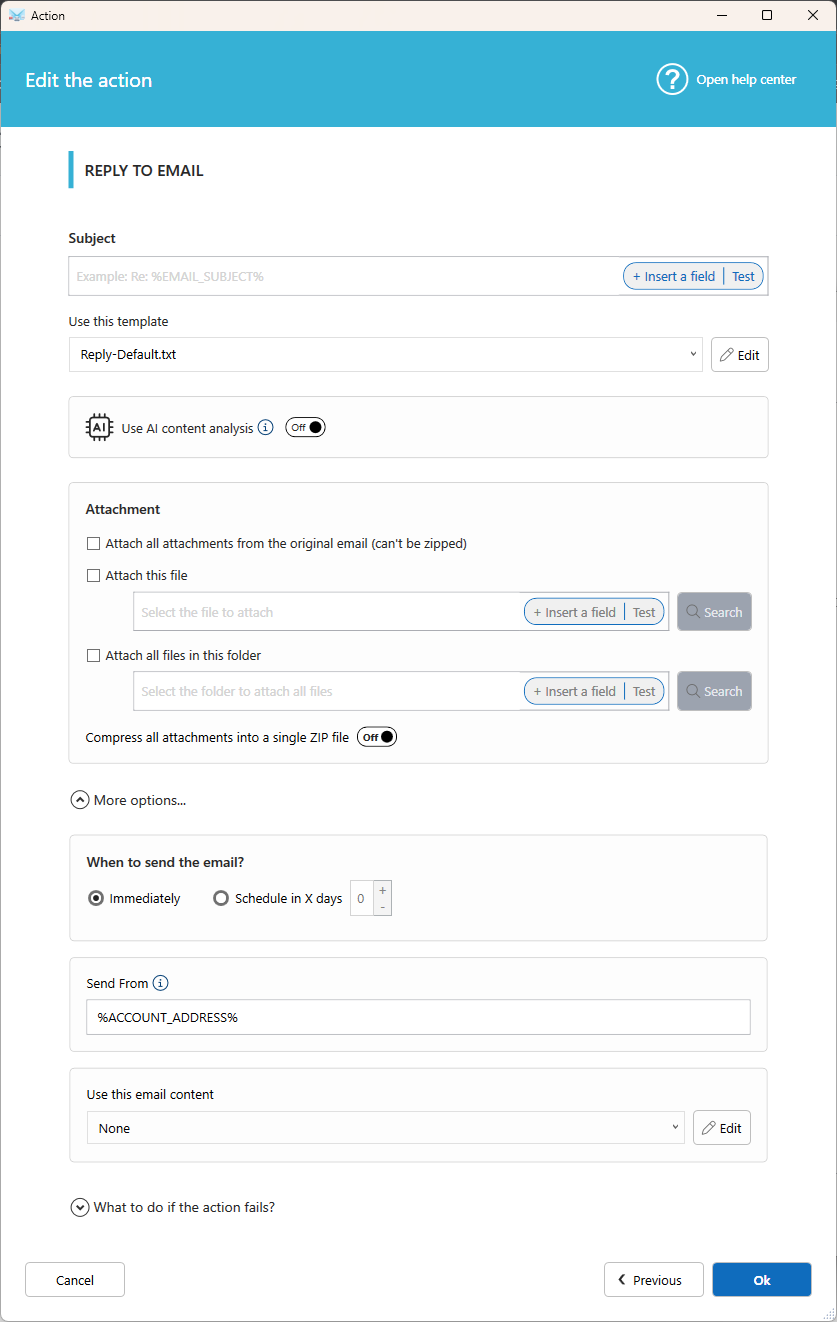
Settings
Subject
Enter the subject line. Click Insert a field to reuse original email data. For example, Re: %EMAIL_SUBJECT%.
Use this template
Choose the layout of your reply. Click Edit to change a template, then save it under a new name to create your own.
Use AI content analysis
Turn this on to let AI email content result in your reply. Learn more.
Attachment
- Attach all attachments from the original email: Sends back the original files. These files can't be zipped.
- Attach this file: Select a single file, or click Insert a field to build the path from email data.
- Attach all files in this folder: Attaches every file found in a folder.
- Compress all attachments into a single ZIP file: Sends one ZIP file instead of several attachments.
Tip: Add a Save email to disk action before this one to convert the email to PDF, then attach the PDF from its folder.
More options
When to send the email?
- Immediately
- Schedule in X days: Sends the reply after the number of days you choose.
Send From
Enter the sender address. We recommend keeping the default value, %ACCOUNT_ADDRESS%.
Most sending errors happen when the address isn't authorized by your SMTP server.
Use this email content
Choose a predefined content to insert in the reply, or select None. Click Edit to create or change one.
What to do if the action fails?
Choose to continue, stop, or run another action. Learn more about Fail Action.